Source control in VSCode and GitHub
Overview
A branch in GitHub can be viewed as a personal copy of all the files in the repository. When creating a branch, all files in the local development environment are treated as separate from the original source.
Changes can be made in those files without affecting the project itself. It's not until committing the files (sending them to GitHub) that the changes will be incorporated into the main project.
The purpose of using branches is to give better control over what files have changed, and by whom. Conflicts, such as when two or more people change something in the same file, are easier to resolve when each modification has its own branch.
Branches in Docs-Products
Branch policy can differ from project to project. In the repo Docs-Products, a new branch should be created each time a commit is made. It's recommended that the name of the branch has some kind of index number in it so it will be easier to keep track of them. For example: initials of the user + index: ea-001.
Creating a branch
A branch is usually created right before a commit is made, after the new additions/code looks OK and is ready for publishing.
To create a new branch, click the Source Control icon in the leftmost menu and then the More action kebab menu. From there, pick Branch -> Create branch...
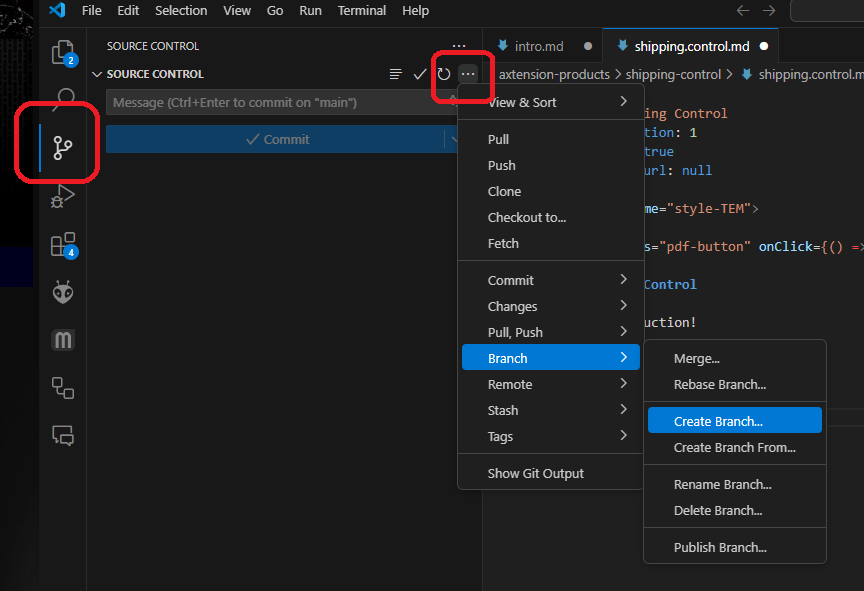
Type in the name of the new branch at the top of the window:
The branch should now be active. The name of the current branch is shown in the leftmost bottom corner of VSCode:
When a branch is created, all files with changes will automatically be added and ready to be committed. Those files are listed under Source Control:
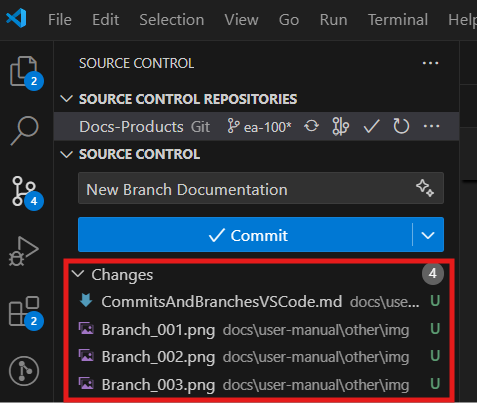
Committing a branch
When ready for publishing, the changed files are sent to GitHub using the Commit function. It is also found under Source Control:
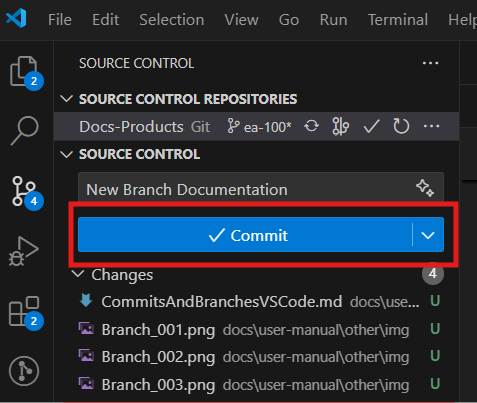
Enter a short description in the field above the button and click it. A message will pop up for confirmation, click Yes.
You might get a message that asks if you want to Stash and Commit all changes, click yes on that as well.
To actually send the files to GitHub, click Sync Changes:
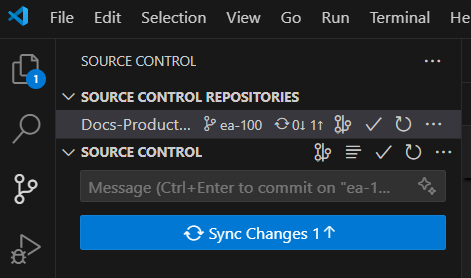
Click Ok in the confirmation dialog:
Done. All that remains is to tell GitHub to merge those changes to the main branch.
Pull Request in GitHub
Open up the repo URL in a browser:
https://GitHub.com/signupsoftware/Docs-Products
On the main page, the commit should show up at the top of the page:
Click Compare & pull request to open up the pull request window:
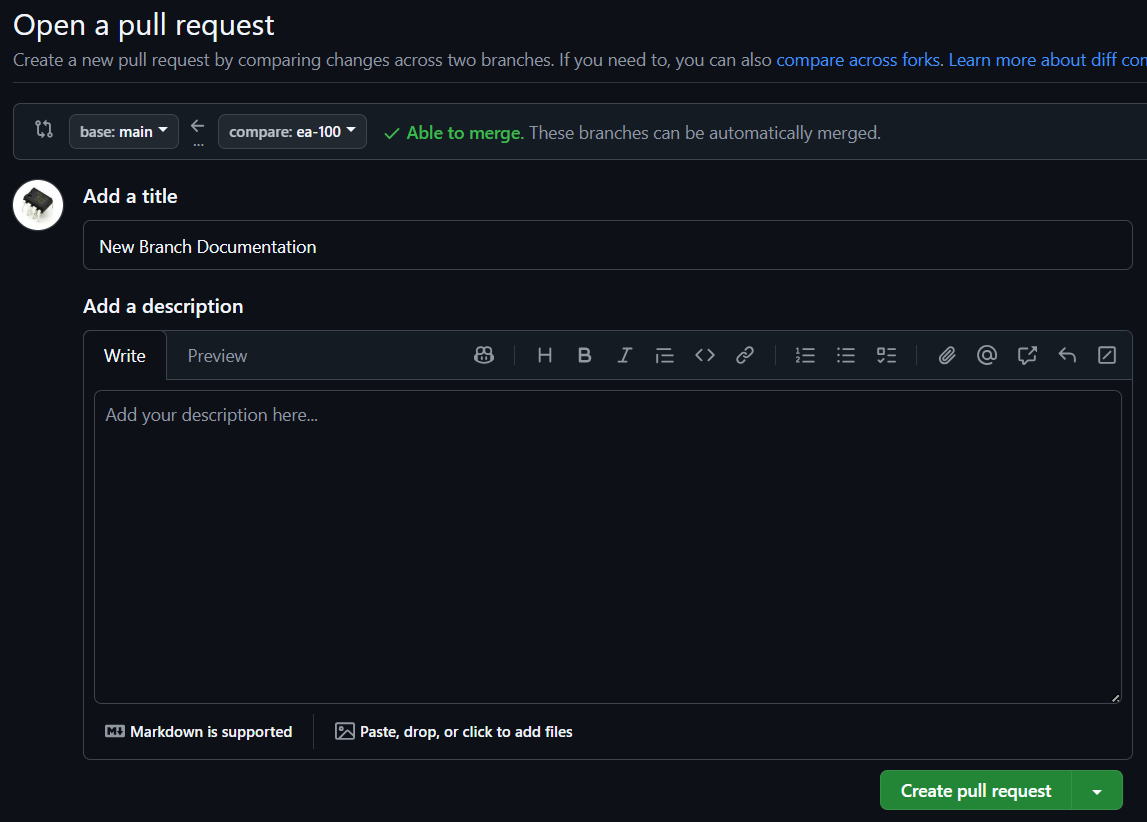
If there are major changes done, a description can be added, otherwise click Create pull request.
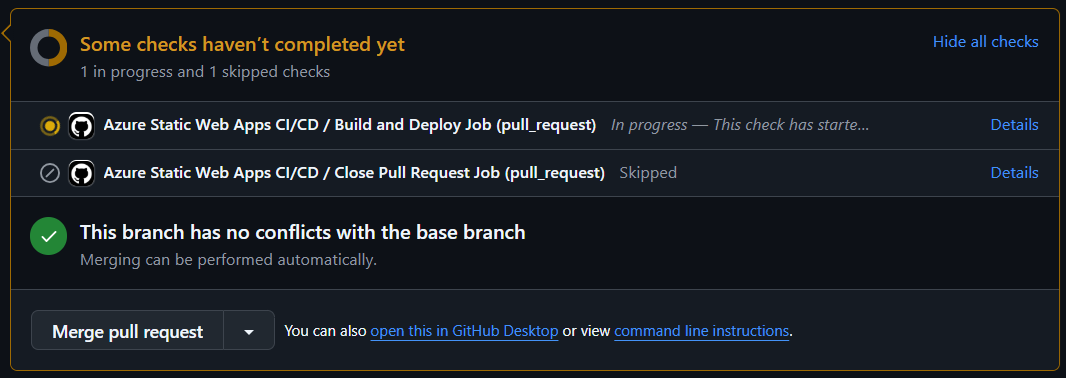
The pull request will begin and a new button Merge pull request will show up. Click that as well:

GitHub will now send the whole repo to Azure with instructions on how to compile the website and where to install it. It can take some time, between 5-10 minutes.
To view details about the process, click Actions in the main GitHub menu:
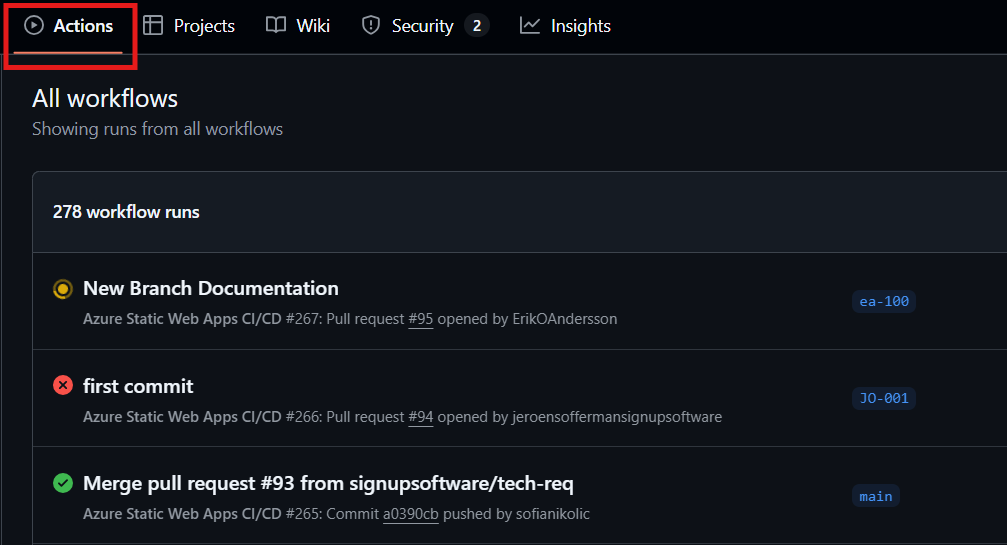
Each ongoing process is marked with a yellow progress icon. Clicking the text beside it will open up a log window that shows each step in real time.
Some pull requests will report an error, although everything went through as it should. That error will show in the logs as:

This can be ignored. It seems to be a mis-reporting between GitHub and Azure, but it's
unclear when it will be fixed. You might get an email reporting this as well.
After that, the changes should be published and show up on the site.
Using git
Branches and commits can also be done using the git command in a terminal or command prompt. To open a terminal in VSCode, click View and pick Terminal. It should show up under the code editor window:

To create a branch, type:
git checkout -b ea-002
(where ea-002 is your branch name)
After that, add all your changes to the branch by typing:
git add .
Commit the changes:
git commit -m "My comment goes here"
Push everything to GitHub:
git push origin ea-002
A pull request should now be ready in GitHub.
In short, these are all the commands needed for handling the VSCode side of things:
git checkout -b ea-002
git add .
git commit -m "My comment goes here"
git push origin ea-002
Other useful commands
To see what files are currently included in the commit, use:
git status
Get the latest changes from the main repo:
git pull origin main
Check if the project has any errors. If it has, GitHub won't accept a pull request:
npm run build
Start a local web server to get a preview of how the pages will look when published:
npm run start
Quick guide
The workflow in short is:
- Get the latest changes
- Make changes/add new files
- Check projects for errors
- Create a new branch
- Do a commit
- Do a Pull Request in GitHub
Get the latest changes
From the Source Control window, pick "Pull" from the kebab menu:

This can also be done by typing git pull origin main in a terminal.
Check projects for errors
In a terminal, type: npm run build. It will take a minute, any errors will show up in red text.--
title: Source control in VSCode and GitHub
sidebar_position: 3
custom_edit_url: null
Do a Pull Request in GitHub
The GitHub repo address is: https://github.com/signupsoftware/Docs-Products